Search

Dark theme | Light theme

September 30, 2015

Ratpacked: Groovy DSL Code Completion In IntelliJ IDEA

Ratpack applications can be written in Java and Groovy. The Java API is already very clean and on top is a Groovy DSL to work with Ratpack. When we use Groovy we can use the DSL, which allows for more clean code. The Ratpack developers have used the @DelegateTo annotation in the source code for the DSL definition. The annotation can be used to indicate which class or interface is used as delegate to execute the closure that is passed to the method. And this helps us a lot in the code editor of IntelliJ IDEA, because IDEA uses this information to give us code completion when we use the Groovy DSL in Ratpack. And that makes using the DSL very easy, because we rely on the IDE to give us the supported properties and methods and we make less mistakes.

Let's see this with an example in code. First we create a new Ratpack.groovy file:

// File: src/ratpack/Ratpack.groovy
import static ratpack.groovy.Groovy.ratpack

ratpack {
    handlers {

    }
}

We want to add a method in the closure that is passed to the handlers method. We first type ge and wait for the code completion to come up:

This is great! We get very informative information to complete our DSL. It is nice to see why this work in the source code of Ratpack for the handlers method:

...
    /**
     * Registers the closure used to build the handler chain of the application.
     *
     * @param configurer The configuration closure, delegating to {@link GroovyChain}
     */
    void handlers(@DelegatesTo(value = GroovyChain.class, strategy = Closure.DELEGATE_FIRST) Closure<?> configurer);

...

The @DelegatesTo annotation defines that the delegate of the closure code is the GroovyChain class. IntelliJ IDEA now knows that GroovyChain is used and gives us via the code completion the methods and properties of GroovyChain.

Written with Ratpack 1.0.0.

Gradle Goodness: Download Javadoc Files For Dependencies In IDE

Gradle has an idea and eclipse plugin that we can use to configure IntelliJ IDEA and Eclipse project files. When we apply these plugins to our project we get extra tasks to generate and change project files. Inside our Gradle build file we get new configuration blocks to specify properties or invoke methods that will change the configuration files. One of the nice things to add is to let the IDE download Javadoc files for dependencies in our Java/Groovy projects. By default the sources for a dependency are already downloaded and added to the project, but Javadoc files are not downloaded.

In the example build file we use the idea and eclipse plugins. We also add an idea and eclipse configuration block. The place where we need to set the property downloadJavadoc is a bit different, but the end result will be the same.

// File: build.gradle
apply {
    plugin 'java'
    plugin 'idea'
    plugin 'eclipse'
}

idea {
    module {
        downloadJavadoc = true
    }
}

eclipse {
    classpath {
        downloadJavadoc = true
    }
}

repositories {
    jcenter()
}

dependencies {
    compile 'org.springframework:spring-context:4.2.1.RELEASE'
}

For example to create the correct files for IntelliJ IDEA we run the task idea. For an existing build file, we can select the Refresh all Gradle projects icon from the Gradle view and IDEA will download missing Javadoc files for the dependencies in our project. In the project file we see for example the location of the Javadoc JAR files:

...
<library name="Gradle: org.springframework:spring-beans:4.2.1.RELEASE">
  <CLASSES>
    <root url="jar://$USER_HOME$/.gradle/caches/modules-2/files-2.1/org.springframework/spring-beans/4.2.1.RELEASE/6d39786b9f7b2a79897a0a83495f30002d9f8de3/spring-beans-4.2.1.RELEASE.jar!/" />
  </CLASSES>
  <JAVADOC>
    <root url="jar://$USER_HOME$/.gradle/caches/modules-2/files-2.1/org.springframework/spring-beans/4.2.1.RELEASE/d7789802c418cd04462f0e2f00cf812912bea33d/spring-beans-4.2.1.RELEASE-javadoc.jar!/" />
  </JAVADOC>
  <SOURCES>
    <root url="jar://$USER_HOME$/.gradle/caches/modules-2/files-2.1/org.springframework/spring-beans/4.2.1.RELEASE/5d017016084ccea18af667cf65e2927800967452/spring-beans-4.2.1.RELEASE-sources.jar!/" />
  </SOURCES>
</library>
...

When we run the eclipse task all Eclipse project files are generated. If we look in the generated .classpath file we see for example that the location for the Javadoc files is added:

...
<classpathentry sourcepath="/Users/mrhaki/.gradle/caches/modules-2/files-2.1/org.springframework/spring-context/4.2.1.RELEASE/676729ef55bb886663ed5454eb61d119ef712f17/spring-context-4.2.1.RELEASE-sources.jar" kind="lib" path="/Users/mrhaki/.gradle/caches/modules-2/files-2.1/org.springframework/spring-context/4.2.1.RELEASE/5bf6dec08e77755c2ec913fde1b8e29083e70a76/spring-context-4.2.1.RELEASE.jar">
    <attributes>
        <attribute name="javadoc_location" value="jar:file:/Users/mrhaki/.gradle/caches/modules-2/files-2.1/org.springframework/spring-context/4.2.1.RELEASE/8d9edd93ea9d918b0895eb6fd4d1c69b301de449/spring-context-4.2.1.RELEASE-javadoc.jar!/"/>
    </attributes>
</classpathentry>

...

Written with Gradle 2.7.

Ratpacked: Use Asynchronous Logging

Ratpack is from the ground up build to be performant and asynchronous. Let's add a logging implementation that matches the asynchronous nature of Ratpack. Ratpack uses the SLF4J API for logging and if we write logging statement in our own code we should use the same API. For Groovy developers it is nothing more than adding the @Slf4j AST annotation to our classes. The Logback library has an asynchronous appender which has a queue to store incoming logging events. Then a worker on a different thread will invoke a classic blocking appender, like a file or console appender, to actually log the messages. But in our example we don't use the standard async appender from Logback, but use a asynchronous logbook appender from the Reactor project. Now our queue is backed by a very performant reactor ring buffer implementation.

The following Logback configuration file shows how we can configure the reactor.logback.AsyncAppender:

<!-- File: src/main/resources/logback.xml -->
<configuration>

    <appender name="STDOUT" class="ch.qos.logback.core.ConsoleAppender">
        <encoder>
            <pattern>%-30(%d{HH:mm:ss.SSS} [%thread]) %-5level %logger{32} - %msg%n</pattern>
        </encoder>
    </appender>

    <!-- Create new asynchronous Logback appender backed by Reactor RingBufferProcessor. -->
    <appender name="ASYNC" class="reactor.logback.AsyncAppender">
        <!-- Backlog size for logging events. Change size if they are picked up slowly.
             Default is 1024 * 1024 -->
        <backlog>1048576</backlog>

        <!-- Caller data is relatively slow, so per default disabled -->
        <includeCallerData>false</includeCallerData>

        <!-- Redirect logging messages to STDOUT -->
        <appender-ref ref="STDOUT"/>
    </appender>

    <root level="INFO">
        <appender-ref ref="ASYNC"/>
    </root>

</configuration>

We need to add a runtime dependency for io.projectreactor:reactor-logback in our build.gradle file to use the AsyncAppender:

...
repositories {
    jcenter()
}

dependencies {
    runtime 'ch.qos.logback:logback-classic:1.1.3'
    runtime 'io.projectreactor:reactor-logback:2.0.5.RELEASE'
}
...

Russell Hart mentioned via Twitter that we can also use asynchronous loggers from Log4j 2 as described in Ratpack book examples. First we must add some new runtime dependencies. Log4j 2 has a bridge for SLF4J API so we add that together with other Log4j 2 dependencies. The asynchronous loggers use LMAX disruptor and we need that as a dependency as well. Our build file now looks like this:

...
repositories {
    jcenter()
}

dependencies {
    ext {
        log4jGroup = 'org.apache.logging.log4j'
        log4jVersion = '2.4'
    }

    runtime "$log4jGroup:log4j-slf4j-impl:$log4jVersion"
    runtime "$log4jGroup:log4j-api:$log4jVersion"
    runtime "$log4jGroup:log4j-core:$log4jVersion"
    runtime 'com.lmax:disruptor:3.3.2'
}
...

Next we create a new configuration file, log4j2.xml, which is used by Log4j 2 to configure the loggers. Notice we use <AsyncLogger/> and <AsyncRoot/> to use asynchronous logging. To learn more about the configuration we need to look at the Log4j website.

<?xml version="1.0" encoding="UTF-8"?>
<!-- File: src/main/resources/log4j2.xml -->
<Configuration status="WARN">
    <Appenders>
        <Console name="STDOUT" target="SYSTEM_OUT">
            <PatternLayout pattern="%m%n"/>
        </Console>
    </Appenders>
    <Loggers>
        <AsyncLogger name="ratpack.server.RatpackServer" level="DEBUG" />
        <AsyncRoot level="ERROR">
            <AppenderRef ref="STDOUT"/>
        </AsyncRoot>
    </Loggers>
</Configuration>

Written with Ratpack 1.0.0.

Ratpacked: Default Port Is 5050

Update: Since Ratpack 1.1.0 the port number is always shown on the console, even if we don't add a SLF4J API implementation.

When we use all the defaults for a Ratpack application the default port that is used for listening to incoming requests is 5050. This is something to remember, because we don't see it when we start the application. If we want to show it, for example in the console, we must add a SLF4J Logging API implementation. Ratpack uses SLF4J API for logging and the port number and address that is used for listening to incoming requests are logged at INFO level. We must add a runtime dependency to our project with a SLF4J API implementation. We provide the necessary logging configuration if needed and then when we start our Ratpack application we can see the port number that is used.

In the following example we use the Logback library as a SLF4J API implementation. We add a runtime dependency ch.qos.logback:logback-classic:1.1.3 to our Gradle build file. If we would use another build tool, we can still use the same dependency. And also we add a simple Logback configuration file in the src/main/resources directory.

// File: build.gradle
plugins {
    id 'io.ratpack.ratpack-java' version '1.0.0'
}

mainClassName = 'com.mrhaki.ratpack.Main'

repositories {
    jcenter()
}

dependencies {
    // Here we add the Logback classic
    // dependency, so we can configure the
    // logging in the Ratpack application.
    runtime 'ch.qos.logback:logback-classic:1.1.3'
}

We create a Logback XML configuration file in src/main/resources:

<!-- File: src/main/resources/logback.xml -->
<configuration>

    <appender name="STDOUT" class="ch.qos.logback.core.ConsoleAppender">
        <encoder>
            <pattern>%msg%n</pattern>
        </encoder>
    </appender>

    <!-- Log all INFO level messages from RatpackServer -->
    <logger name="ratpack.server.RatpackServer" level="INFO"/>

    <root level="ERROR">
        <appender-ref ref="STDOUT"/>
    </root>

</configuration>

When we start the application with Gradle we can see in our console the logging messages from the RatpackServer. The last line shows the port number of our running Ratpack application:

$ gradle -q run
Starting server...
Building registry...
Ratpack started (development) for http://localhost:5050

Written with Ratpack 1.0.0.

September 28, 2015

Grails Goodness: Get List Of Application Profiles

Grails 3 introduced the concept of application profiles to Grails. A profile contains the application structure, dependencies, commands and more to configure Grails for a specific type of application. The profiles are stored on the Grails Profile repository on Github. We can go there and see which profiles are available, but it is much easier to use the list-profiles command. With this command we get an overview of all the available profiles we can use to create a new application or plugin.

The list-profiles task is only available when we are outside a Grails application directory. So just like the create-app and create-plugin we can run list-profiles from a non-Grails project directory.

$ grails list-profiles
| Available Profiles
--------------------
* base - The base profile extended by other profiles
* plugin - Profile for plugins designed to work across all profiles
* web - Profile for Web applications
* web-api - Profile for Web API applications
* web-micro - Profile for creating Micro Service applications run as Groovy scripts
* web-plugin - Profile for Plugins designed for Web applications
$

Once we know which profile we want to use we can use the name as value for the --profile option with the create-app command:

$ grails create-app sample-micro --profile=web-micro
| Application created at /Users/mrhaki/Projects/mrhaki.com/blog/posts/samples/grails3/sample-micro
$

Written with Grails 3.0.8.

Grails Goodness: Run Gradle Tasks In Grails Interactive Mode

To start Grails in interactive mode we simply type grails on the command line. This starts Grails and we get an environment to run Grails commands like compile and run-app. Since Grails 3 the underlying build system has changed from Gant to Gradle. We can invoke Gradle tasks in interactive mode with the gradle command. Just like we would use Gradle from the command line we can run the same tasks, but this time when Grails is in interactive mode. Grails will use the Gradle version that belongs to the current Grails version.
We even get TAB completion for Gradle tasks.

In the next example we start Grails in interactive mode and run the Gradle task components:

$ grails
| Enter a command name to run. Use TAB for completion:
grails> gradle components
:components

------------------------------------------------------------
Root project
------------------------------------------------------------

No components defined for this project.

Additional source sets
----------------------
Java source 'main:java'
    src/main/java
JVM resources 'main:resources'
    src/main/resources
    grails-app/views
    grails-app/i18n
    grails-app/conf
Java source 'test:java'
    src/test/java
JVM resources 'test:resources'
    src/test/resources
Java source 'integrationTest:java'
    src/integrationTest/java
JVM resources 'integrationTest:resources'
    src/integrationTest/resources

Additional binaries
-------------------
Classes 'integrationTest'
    build using task: :integrationTestClasses
    platform: java8
    tool chain: JDK 8 (1.8)
    classes dir: build/classes/integrationTest
    resources dir: build/resources/integrationTest
Classes 'main'
    build using task: :classes
    platform: java8
    tool chain: JDK 8 (1.8)
    classes dir: build/classes/main
    resources dir: build/resources/main
Classes 'test'
    build using task: :testClasses
    platform: java8
    tool chain: JDK 8 (1.8)
    classes dir: build/classes/test
    resources dir: build/resources/test

Note: currently not all plugins register their components, so some components may not be visible here.

BUILD SUCCESSFUL

Total time: 0.506 secs

Next we invoke gradle compile followed by TAB. We get all the Gradle tasks that start with compile:

grails> gradle compile<TAB>

compileGroovy                  compileGroovyPages             
compileIntegrationTestGroovy   compileIntegrationTestJava     
compileJava                    compileTestGroovy              
compileTestJava                compileWebappGroovyPages 
grails>

Written with Grails 3.0.8.

Grails Goodness: Update Application With Newer Grails Version

In this blog post we see how to update the Grails version of our application for a Grails 3 application. In previous Grails versions there was a special command to upgrade, but with Grails 3 it is much simpler. To update an application to a newer version in the Grails 3.0.x range we only have to change the value of the property grailsVersion in the file gradle.properties.

# gradle.properties
grailsVersion=3.0.8
gradleWrapperVersion=2.3

After we have changed the value we run the clean and compile tasks so all dependencies are up-to-date.

Written with Grails 3.0.8.

Grails Goodness: Use A Different Logging Configuration File

Since Grails 3 the logging configuration is in a separate file. Before Grails 3 we could specify the logging configuration in grails-app/conf/Config.groovy, since Grails 3 it is in the file grails-app/conf/logback.groovy. We also notice that since Grails 3 the default logging framework implementation is Logback. We can define a different Logback configuration file with the environment configuration property logging.config. We can set this property in grails-app/conf/application.yml, as Java system property (-Dlogging.config=<location>) or environment variable (LOGGING_CONFIG). Actually all rules for external configuration of Spring Boot apply for the configuration property logging.config.

In the following example configuration file we have a different way of logging in our Grails application. We save it as grails-app/conf/logback-grails.groovy:

// File: grails-app/conf/logback-grails.groovy
import grails.util.BuildSettings
import grails.util.Environment

import org.springframework.boot.ApplicationPid

import java.nio.charset.Charset

// Log information about the configuration.
statusListener(OnConsoleStatusListener)

// Get PID for Grails application.
// We use it in the logging output.
if (!System.getProperty("PID")) {
    System.setProperty("PID", (new ApplicationPid()).toString())
}

conversionRule 'clr', org.springframework.boot.logging.logback.ColorConverter
conversionRule 'wex', org.springframework.boot.logging.logback.WhitespaceThrowableProxyConverter

// See http://logback.qos.ch/manual/groovy.html for details on configuration
appender('STDOUT', ConsoleAppender) {
    encoder(PatternLayoutEncoder) {
        charset = Charset.forName('UTF-8')
        pattern =
                '%clr(%d{yyyy-MM-dd HH:mm:ss.SSS}){faint} ' + // Date
                        '%clr(%5p) ' + // Log level
                        '%clr(%property{PID}){magenta} ' + // PID
                        '%clr(---){faint} %clr([%15.15t]){faint} ' + // Thread
                        '%clr(%-40.40logger{39}){cyan} %clr(:){faint} ' + // Logger
                        '%m%n%wex' // Message
    }
}

root(WARN, ['STDOUT'])

if(Environment.current == Environment.DEVELOPMENT) {
    root(INFO, ['STDOUT'])

    def targetDir = BuildSettings.TARGET_DIR
    if(targetDir) {

        appender("FULL_STACKTRACE", FileAppender) {

            file = "${targetDir}/stacktrace.log"
            append = true
            encoder(PatternLayoutEncoder) {
                pattern = "%level %logger - %msg%n"
            }
        }
        logger("StackTrace", ERROR, ['FULL_STACKTRACE'], false )
    }
}

We use this configuration file with the following command:

$ LOGGING_CONFIG=classpath:logback-grails.groovy grails run-app
...
2015-09-28 16:52:38.758  INFO 26895 --- [           main] o.a.c.c.C.[Tomcat].[localhost].[/]       : Initializing Spring FrameworkServlet 'grailsDispatcherServlet'
2015-09-28 16:52:38.758  INFO 26895 --- [           main] o.g.w.s.mvc.GrailsDispatcherServlet      : FrameworkServlet 'grailsDispatcherServlet': initialization started
2015-09-28 16:52:38.769  INFO 26895 --- [           main] o.g.w.s.mvc.GrailsDispatcherServlet      : FrameworkServlet 'grailsDispatcherServlet': initialization completed in 11 ms
2015-09-28 16:52:38.769  INFO 26895 --- [           main] s.b.c.e.t.TomcatEmbeddedServletContainer : Tomcat started on port(s): 8080 (http)
...

Written with Grails 3.0.8.

Grails Goodness: Change Base Name For External Configuration Files

With Grails 3 we get the Spring Boot mechanism for loading external configuration files. The default base name for configuration files is application. Grails creates for example the file grails-app/conf/application.yml to store configuration values if we use the create-app command. To change the base name from application to something else we must specify a value for the Java system property spring.config.name.

In the following example we start Grails with the value config for the Java system property spring.config.name. So now Grails looks for file names like config.yml, config.properties, config-{env}.properties and config-{env}.yml in the default locations config directory, root directory on the filesystem and in the class path.

$ grails -Dspring.config.name=config run-app
...

To pass the system properties when we use Grails commands we must change our build.gradle and reconfigure the run tasks so any Java system property from the command line are passed on to Grails:

...
tasks.findAll { task ->
    task.name  in ['run', 'bootRun']
}.each { task ->
    task.systemProperties System.properties
}

Remember that if we use this system property the default grails-app/conf/application.yml is no longer used.

Written with Grails 3.0.8.

Grails Goodness: Use Different External Configuration Files

A Grails 3 application uses the same mechanism to load external configuration files as a Spring Boot application. This means the default locations are the root directory or config/ directory in the class path and on the file system. If we want to specify a new directory to search for configuration files or specify the configuration files explicitly we can use the Java system property spring.config.location.

In the following example we have a configuration application.yml in the settings directory. The default base name for a configuration file is application, so we use that base name in our example. In this sample we use a YAML configuration file where we override the property sample.config for the Grails production environment.

# File: settings/application.yml
sample:
  config: From settings/.

---
environments:
  production:
    sample:
      config: From settings/ dir and production env.

Next we need to reconfigure the run and bootRun tasks, both of type JavaExcec, to pass on Java system properties we use from the command line when we use the Grails commands:

// File: build.gradle
...
tasks.withType(JavaExec).each { task ->
    task.systemProperties System.properties
}

Now we can start our Grails application with the Java system property spring.config.location. We add the settings directory as a search location for configuration files. We add both the directory as a local directory as well as a root package name in the class path:

$ grails -Dspring.config.location=settings/,classpath:/settings/ run-app
...

In the following example we have a configuration config.yml in the root of our project:

# File: config.yml
sample:
  config: From config.yml.

---
environments:
  production:
    sample:
      config: From config.yml dir and production env.

Now we start Grails and use the explicit file name as a value for the Java system property spring.config.location:

$ grails -Dspring.config.location=file:./config.yml run-app
...

We could specify multiple files separated by comma's. Or even combine it with directories like we used in the first example.

Written with Grails 3.0.8.

Grails Goodness: Using Random Values For Configuration Properties

Since Grails 3 we can use a random value for a configuration property. This is because Grails now uses Spring Boot and this adds the RandomValuePropertySource class to our application. We can use it to produce random string, integer or lang values. In our configuration we only have to use ${random.<type>} as a value for a configuration property. If the type is int or long we get a Integer or Long value. We can also define a range of Integer or Long values that the generated random value must be part of. The syntax is ${random.int[<start>]} or ${random.int[<start>,<end>}. For a Long value we replace int with long. It is also very important when we define an end value that there cannot be any spaces in the definition. Also the end value is exclusive for the range.
If the type is something else then int or long a random string value is generated. So we could use any value after the dot (.) in ${random.<type>} to get a random string value.

In the following example configuration file we use a random value for the configuration properties sample.random.password, sample.random.longNumber and sample.random.number:

# File: grails-app/conf/application.yml
...
---
sample:
    random:
        password: ${random.password}
        longNumber: ${random.long}
        number: ${random.int[400,420]}
...

Next we have this simple class that used the generated random values and displays them on the console when the application starts:

// File: src/main/groovy/com/mrhaki/grails/random/RandomValuesPrinter.groovy
package com.mrhaki.grails.random

import org.springframework.beans.factory.annotation.Value
import org.springframework.boot.CommandLineRunner
import org.springframework.stereotype.Component

@Component
class RandomValuesPrinter implements CommandLineRunner {

    @Value('${sample.random.password}')
    String password

    @Value('${sample.random.number}')
    Integer intValue

    @Value('${sample.random.longNumber}')
    Long longValue

    @Override
    void run(final String... args) throws Exception {
        println '-' * 29
        println 'Properties with random value:'
        println '-' * 29

        printValue 'Password', password
        printValue 'Integer', intValue
        printValue 'Long', longValue
    }

    private void printValue(final String label, final def value) {
        println "${label.padRight(12)}: ${value}"
    }

}

When we run our Grails application we can see the generated values:

$ grails run-app
...
-----------------------------
Properties with random value:
-----------------------------
Password    : 018f8eea05470c6a9dfe0ce3c8fbd720
Integer     : 407
Long        : -1201232072823287680
...

Written with Grails 3.0.8.

September 24, 2015

Grails Goodness: Using External Configuration Files Per Environment

Grails 3 is build on top of Spring Boot and this adds a lot of the Spring Boot features to our Grails application. For example in Spring Boot we can store configuration properties in an external file. A default Grails application already adds application.yml in the grails-app/conf directory. If we want to specify different values for a configuration property for each environment (like development, test and production) we can use environment section in application.yml. We know this from previous Grails versions with a Groovy configuration file Config.groovy. But we can also create different configuration files per environment and set the value for the configuration property in each file. We can use the following naming pattern for the file: application-{env}.yml or application-{env}.properties. These files need be in:

  1. a config directory in the directory the application is running from
  2. the root of the directory the application is running from
  3. in a /config package on the classpath
  4. in the root of the classpath

The order is important, because properties defined in the first locations override the properties in the last locations. When we place the files in grails-app/conf they get on the root of the classpath. We could also use for example src/main/resources/config to place extra configuration files on the classpath.

Let's see this in action with a simple Grails application. We write an implementation of the CommandLineRunner interface to show the value of the sample.conf configuration property when the application starts:

// File: grails-app/init/com/mrhaki/grails/EnvironmentPrinter.groovy
package com.mrhaki.grails

import grails.config.Config
import grails.core.GrailsApplication
import grails.util.Environment
import org.springframework.beans.factory.annotation.Autowired
import org.springframework.boot.CommandLineRunner
import org.springframework.stereotype.Component

@Component
class EnvironmentPrinter implements CommandLineRunner {

    @Autowired
    GrailsApplication grailsApplication

    @Override
    void run(final String... args) throws Exception {
        println "Running in ${Environment.current.name}"

        // Get configuration from GrailsApplication.
        final Config configuration = grailsApplication.config
        
        // Get the value for sample.config.
        final String sampleConfigValue = configuration.getProperty('sample.config')

        // Print to standard out.
        println "Value for sample.config configuration property = $sampleConfigValue"
    }

}

We define the configuration property in grails-app/conf/application.yml:

# File: grails-app/conf/application.yml
...
sample:
    config: Value from application.yml
...

Next we create a file grails-app/conf/application-development.yml which should be used when we run our Grails application in development mode:

# File: grails-app/conf/application-development.yml
sample:
    config: Value from application-development.yml

Besides YAML format we can also use the plain old properties format files. We create grails-app/conf/application-production.properties with a value for sample.config used when Grails runs in production mode:

# File: grails-app/conf/application-production.properties
sample.config = Value from application-production.properties

Finally we add a configuration file for a custom Grails environment:

# File: grails-app/conf/application-custom.yml
sample:
    config: Value from application-custom.yml

Now let's run the Grails application with different environments and see what value the sample.config property has:

$ grails run-app
| Running application...
Running in development
Value for sample.config configuration property = Value from application-development.yml.
...
$ grails -Dgrails.env=custom run-app
| Running application...
Running in custom
Value for sample.config configuration property = Value from application-custom.yml.
...
$ grails prod run-app
| Running application...
Running in production
Value for sample.config configuration property = Value from application-production.properties.
...

Written with Grails 3.0.7.


September 22, 2015

Grails Goodness: Defining Spring Beans With doWithSpring Method

Grails 3 introduces GrailsAutoConfiguration as the base class for a Grails application. We can extend this class, add a main method and we are ready to go. By default this class is the Application class in the grails-app/init directory. We can override several Grails lifecycle methods from the GrailsAutoConfiguration base class. One of them is doWithSpring. This method must return a closure that can be used by the Grails BeanBuilder class to add Spring beans to the application context. The closure has the same syntax as what we already know for the grails-app/conf/spring/resources.groovy file, we know from previous Grails versions.

We start with a simple class we want to use as a Spring bean:

// File: src/main/groovy/com/mrhaki/grails/SampleBean.groovy
package com.mrhaki.grails

class SampleBean {
    String message
}

Next we create a class that implements the CommandLineRunner interface. Grails will pick up this class, if we configure it as a Spring bean, at startup and executes the code in the run method.

// File: src/main/groovy/com/mrhaki/grails/SamplePrinter.groovy
package com.mrhaki.grails

import org.springframework.beans.factory.annotation.Autowired
import org.springframework.boot.CommandLineRunner

class SamplePrinter implements CommandLineRunner {

    @Autowired
    SampleBean sample

    @Override
    void run(final String... args) throws Exception {
        println "Sample printer says: ${sample.message}"
    }
}

Now we are ready to register these classes as Spring beans using the doWithSpring method in our Application class:

// File: grails-app/init/com/mrhaki/grails/Application.groovy
package com.mrhaki.grails

import grails.boot.GrailsApp
import grails.boot.config.GrailsAutoConfiguration

class Application extends GrailsAutoConfiguration {

    @Override
    Closure doWithSpring() {
        // Define closure with Spring bean
        // definitions, like resources.groovy.
        def beans = {
            // Define Spring bean with name sample
            // of type SampleBean.
            sample(SampleBean) {
                message = 'Grails 3 is so gr8!'
            }

            // Register CommandLineRunner implementation
            // as Spring bean.
            sampleBootstrap(SamplePrinter)
        }
        return beans
    }

    static void main(String[] args) {
        GrailsApp.run(Application, args)
    }

}

Now we can run our Grails application and in our console we see the message:

grails> run-app
| Running application...
Sample printer says: Grails 3 is so gr8!
Grails application running at http://localhost:8080 in environment: development
grails> 

Written with Grails 3.0.7.

Grails Goodness: Passing System Properties With Gradle

In a previous post we learned how to pass Java system properties from the command-line to a Java process defined in a Gradle build file. Because Grails 3 uses Gradle as the build tool we can apply the same mechanism in our Grails application. We need to reconfigure the run task. This task is of type JavaExec and we can use the method systemProperties to assign the system properties we define on the command-line when we invoke the run task.

We have a simple Grails 3 application with the following controller that tries to access the Java system property sample.message:

// File: grails-app/controllers/com/mrhaki/grails/SampleController.groovy
package com.mrhaki.grails

class SampleController {

    def index() {
        final String message =
            System.properties['sample.message'] ?: 'gr8'
        render "Grails is ${message}!"
    }
}

Next we configure the run and bootRun tasks and use System.properties with the Java system properties from the command-line as argument for the systemProperties method:

// File: build.gradle
...

[run, bootRun].each { runTask ->
    configure(runTask) {
        systemProperties System.properties
    }
}

...

Now we can invoke the run or bootRun tasks with Gradle:

$ gradle -Dsample.message=cool run

Or we can execute the run-app command with the grails command:

grails> run-app -Dsample.message=cool

Written with Grails 3.0.7.

Grails Goodness: Pass Configuration Values Via Environment Variables

Since Grails 3 is based on Spring Boot we can re-use many of the Spring Boot features in our Grails application. For example in a Spring Boot application we can use environment variables to give configuration properties a value. We simply need to follow some naming rules: the name of the configuration property must be in uppercase and dots are replaced with underscores. For example a configuration property feature.enabled is represented by the environment variable FEATURE_ENABLED.

We create the following controller in a Grails 3 application with a message property. The value is set with the @Value annotation of the underlying Spring framework. With this annotation we tell the application to look for an (external) configuration property sample.message and assign it's value to the message property. If it cannot be set via a configuration property the default value is "gr8".

package com.mrhaki.grails

import org.springframework.beans.factory.annotation.Value

class SampleController {

    @Value('${sample.message:gr8}')
    String message

    def index() {
        render "Grails is ${message}!"
    }
}

If we run the application with grails run-app or gradle run the result of opening http://localhost:8080/sample is Grails is gr8!.

Now we use the environment variable SAMPLE_MESSAGE to assign a new value to the message property:

$ SAMPLE_MESSAGE=great grails run-app
...
Grails application running at http://localhost:8080 in environment: development

Now when we access http://localhost:8080/sample we get Grails is great!. If we use Gradle to start our Grails application we can use SAMPLE_MESSAGE=great gradle run.

Written with Grails 3.0.7.

Grails Goodness: See Information About Plugins

In Grails we can use the list-plugins command to get a list of all available plugins. The list returns only the plugins that are available for the Grails version we are using. So if we invoke this command in Grails 3 we get a different list than a Grails 2.x version. To get more detailed information, like website, source code URL and dependency definition we use the plugin-info command.

Let's run the plugin-list command for Grails 3:

grails> list-plugins
| Available Plugins
* airbrake-grails
* ajax-tags
* asset-pipeline
* audit-logging
* aws-sdk
* cache
* cache-ehcache
* cache-headers
* cassandra
* clojure
* csv
* database-migration
* export
* facebook-sdk
* feature-switch
* feeds
* fields
* geb
* gorm-envers
* grails-console
* grails-hibernate-filter
* grails-http-builder-helper
* grails-json-apis
* grails-redis
* grails-spring-websocket
* greenmail
* grooscript
* gscripting
* hibernate
* jasypt-encryption
* jms
* joda-time
* json-annotations-marshaller
* mail
* mongodb
* newrelic
* oauth
* quartz
* quartz-monitor
* rateable
* recaptcha
* rendering
* request-tracelog
* scaffolding
* segment
* sentry
* simple-spring-security
* spring-security-acl
* spring-security-appinfo
* spring-security-core
* taggable
* views-gradle
* views-json
* views-markup
* wkhtmltopdf

If we want more information about the spring-security-core plugin we invoke the following command:

grails> plugin-inf spring-security-core
| Plugin Info: spring-security-core
| Latest Version: 3.0.0.M1
| All Versions: 3.0.0.M1
| Title: Spring Security Core Plugin

Spring Security Core plugin

* License: APACHE
* Documentation: http://grails-plugins.github.io/grails-spring-security-core/
* Issue Tracker: https://github.com/grails-plugins/grails-spring-security-core/issues
* Source: https://github.com/grails-plugins/grails-spring-security-core
* Definition:

dependencies {
    compile "org.grails.plugins:spring-security-core:3.0.0.M1"    
}

If we would invoke the command in for example Grails 2.5.1 we get different results:

grails> list-plugins

Plugins available in the grailsCentral repository are listed below:
-------------------------------------------------------------
DjangoTemplates Plugin<>               --  
None                <>               --  
acegi               <0.5.3.2>        --  Acegi Plugin
active-link         <1.0>            --  Active Link Tag Plugin
activemq            <0.5>            --  Grails ActiveMQ Plugin
activiti            <5.12.1>         --  Grails Activiti Plugin - Enabled Activiti BPM Suite support for Grails
activiti-shiro      <0.1.1>          --  This plugin integrates Shiro Security to Activiti.
activiti-spring-security<0.5.0>          --  Activiti Spring Security Integration
acts-as-taggable    <>               --  
address             <0.2>            --  Grails Address Plugin
address-lookup-zpfour<0.1.2>          --  Address Lookup via ZP4
admin-interface     <0.7.1>          --  Grails Admin Interface
adminlte-ui         <0.1.0>          --  AdminLTE UI Plugin
airbrake            <0.9.4>          --  Airbrake Plugin
ajax-proxy          <0.1.1>          --  Ajax Proxy Plugin
ajax-uploader       <1.1>            --  Ajax Uploader Plugin
ajaxanywhere        <1.0>            --  AjaxAnywhere Grails Plugin
ajaxdependancyselection<0.45-SNAPSHOT4> --  Ajax Dependancy Selection Plugin
ajaxflow            <0.2.4>          --  This plugin enables Ajaxified Webflows
akismet             <0.2>            --  Akismet Anti-Spam Plugin
akka                <2.2.4.1>        --  Akka Integration
alfresco            <0.4>            --  Alfresco DMS Integration

...

Plug-ins you currently have installed are listed below:
-------------------------------------------------------------
asset-pipeline      2.2.3            --  Asset Pipeline Plugin
cache               1.1.8            --  Cache Plugin
database-migration  1.4.0            --  Grails Database Migration Plugin
hibernate4          4.3.10           --  Hibernate 4 for Grails
jquery              1.11.1           --  jQuery for Grails
scaffolding         2.1.2            --  Grails Scaffolding Plugin
tomcat              7.0.55.3         --  Apache Tomcat plugin for Grails
webxml              1.4.1            --  WebXmlConfig

To find more info about plugin type 'grails plugin-info [NAME]'

To install type 'grails install-plugin [NAME] [VERSION]'

For further info visit http://grails.org/Plugins

grails> plugin-info spring-security-core

--------------------------------------------------------------------------
Information about Grails plugin
--------------------------------------------------------------------------
Name: spring-security-core | Latest release: 2.0-RC5
--------------------------------------------------------------------------
Spring Security Core Plugin
--------------------------------------------------------------------------
Author: Burt Beckwith
--------------------------------------------------------------------------
Author's e-mail: burt@burtbeckwith.com
--------------------------------------------------------------------------
Find more info here: http://grails-plugins.github.io/grails-spring-security-core/
--------------------------------------------------------------------------

Spring Security Core plugin


Dependency Definition
--------------------------------------------------------------------------
    :spring-security-core:2.0-RC5


To get info about specific release of plugin 'grails plugin-info [NAME] [VERSION]'

To get list of all plugins type 'grails list-plugins'

For further info visit http://grails.org/plugins

In Grails versions before Grails 3 we also have the command list-plugin-updates. This command will display if there are any version updates for the plugins installed in our application:

grails> list-plugin-updates

Plugins with available updates are listed below:
-------------------------------------------------------------
<plugin>            <current>         <available>
tomcat              7.0.55.3          8.0.22
hibernate4          4.3.10            4.3.8.2-SNAPSHOT
database-migration  1.4.0             1.4.2-SNAPSHOT
cache               1.1.8             1.1.9-SNAPSHOT
asset-pipeline      2.2.3             2.5.1

Written with Grails 3.0.7.

Groovy Goodness: Defining Public Accessible Constant Fields

There is a catch when we define a constant field in Groovy. Rob Fletcher blogged about this in the post Groovy the public keyword a while ago. When we omit the public keyword for a method then the method is still accessible as public method, because Groovy makes the method public when the class is compiled. When we leave out the public keyword for fields Groovy creates a getter and setter method for the field at compile time and turns it into a property that applies to the Java Bean specification. This is also true if the field is static. So if we define a constant value as static final we must keep in mind that Groovy will generate a getter method so the constant value is a read only property according to Java Bean specification.

Let's create a simple class with a constant field DEFAULT, a property message and a message method. We leave out any public keyword:

// File: sample.groovy
// Groovy makes class public.
class Sample {
    // Groovy adds getDEFAULT and no setDEFAULT.
    static final String DEFAULT = 'default'
  
    // Groovy adds setMessage/getMessage
    String message

    // Groovy makes method public.
    void message(final String newMessage) {
        this.message = message
    }
}

If we compile this class we get the following methods and fields (using javap to inspect the class):

$ javap -p -constants Sample
Compiled from "sample.groovy"
public class Sample implements groovy.lang.GroovyObject {
  private static final java.lang.String DEFAULT = "default";
  private java.lang.String message;
  ...
  public void message(java.lang.String);
  ...
  public static final java.lang.String getDEFAULT();
  public java.lang.String getMessage();
  public void setMessage(java.lang.String);
}

If we want to access the constant field in Groovy we can still use Sample.DEFAULT, but from Java code this doesn't work. You can see in the generated class file we should invoke getDEFAULT(), because this method is public. To overcome this we simply add public to our constant field definition. This way Groovy will leave the field unchanged and in the generated class file it is still public. Then from Java we can use Sample.DEFAULT to access the constant value. Let's see the output of javap when we make the DEFAULT field public:

$ javap -p -constants Sample
Compiled from "sample.groovy"
public class Sample implements groovy.lang.GroovyObject {
  public static final java.lang.String DEFAULT = "default";
  private java.lang.String message;
  ...
  public void message(java.lang.String);
  ...
  public java.lang.String getMessage();
  public void setMessage(java.lang.String);
}

This also helps an IDE, like IntelliJ IDEA, to do a proper import static based on the constant field.

Written with Groovy 2.4.4.

September 21, 2015

Spocklight: Mocks And Stubs Returning Sequence of Values

Creating and working with mocks and stubs in Spock is easy. If we want to interact with our mocks and stubs we have several options to return values. One of the options is the triple right shift operator >>>. With this operator we can define different return values for multiple invocations of the stubbed or mocked method. For example we can use the >>> operator followed by a list of return values ['abc', 'def', 'ghi']. On the first invocation abc is return, the second invocation returns def and the third (and following) invocation(s) return ghi.

In the following specification we have a class under test StringUtil. The class has a dependency on an implementation of the Calculator interface. We mock this interface in our specification. We expect the calculateSize method is invoked 5 times, but we only provide 3 values for the invocations. This means the first time 1 is used, the second time 3 is used and the remaining invocations get the value 4:

package com.mrhaki.spock

@Grab('org.spockframework:spock-core:1.0-groovy-2.4')
import spock.lang.Specification
import spock.lang.Subject

class SampleSpec extends Specification {

    @Subject
    def util = new StringUtil()

    def "Calculate sizes of String values"() {
        given:
        def calculator = Mock(Calculator)
        util.calculator = calculator

        when:
        def total = util.size('one', 'two', 'three', 'four', 'five')

        then:
        5 * calculator.calculateSize(_) >>> [1,3,4]

        total == 1 + 3 + 4 + 4 + 4
    }

}

class StringUtil {
    def calculator

    int size(final String[] s) {
        s.sum { calculator.calculateSize(it) }
    }
}

interface Calculator {
    int calculateSize(final String s)
}

Written with Spock 1.0-groovy-2.4.

Groovy Goodness: Turn Method Parameters Into Named Map Arguments With IntelliJ IDEA

A very useful feature in Groovy is the use of named arguments. Instead of a list of arguments for a method or constructor we can use a Map argument. If the argument is the first in the list of arguments then Groovy allows use to use named arguments when we invoke the method or constructor. This means all key/value arguments are gathered together and assigned to the Map argument. Inside our method or constructor we can then access the Map argument and get the values for the keys. This leads to better readable code and that is very useful. IntelliJ IDEA has a Groovy intention to turn method parameters into a Map parameter for named arguments with a few mouse clicks.

Suppose we have the following source code with a simple method definition, 2 arguments, and the invocation of the method:

Now we activate the Groovy intentions (for me it is Alt+Enter or try Shift+Shift and type Show intentions actions) while we place the cursor on the parameter greeting. We select the option Convert parameter to map entry:

IntelliJ IDEA opens a new dialog. Here we can choose to create a new Map parameter for named arguments. If our method would have a Map argument already we can re-use it. We can let IDEA add the Map type or leave it out. Finally we can change the name of the parameter. In our example we have changed it to conf:

When we click the OK button we see our source code has changed. Not only the method signature of the simple method, but also the invocation has changed:

We can re-apply the same intention for the username parameter and we get the following code:

Written with IntelliJ IDEA CE 14.1.4.

Groovy Goodness: Turn Map Into Class With IntelliJ IDEA

IntelliJ IDEA has very good Groovy support. It also provides some intentions especially for the Groovy language. For example we can turn a map definition into a Groovy class definition with a few simple clicks.

The following screenshot shows a simple map declaration with two keys: username and alias. If we use the shortcut for intentions (Alt+Enter on my computer) we can choose the Convert to Class option:

IDEA opens a new dialog window where we can type the name of the class we want to generate and a package name:

When we click the OK button IDEA generates a new Groovy class file in our project:

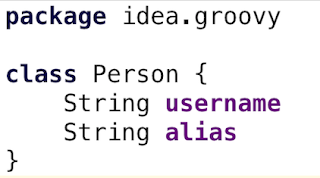
Also our original source where we declared the map is changed. Now the constructor of the new class is declared and the original values from the map are assigned to the correct properties of the class:

Written with IntelliJ IDEA CE 14.1.4.

Spring Sweets: Java System Properties As Configuration Properties With Spring Boot

In a previous post we learned that configuration property values can be passed via environment variables. With Spring Boot we can also pass the values using Java system properties. So if we have a property sample.message then we can use -Dsample.message=value to pass a value when we run the application. If we use the Spring Boot Gradle plugin we must reconfigure the bootRun task to pass Java system properties from the command-line.

Let's reuse our sample application from the previous blog post:

package com.mrhaki.spring

import org.springframework.beans.factory.annotation.Value
import org.springframework.boot.CommandLineRunner
import org.springframework.boot.SpringApplication
import org.springframework.boot.autoconfigure.SpringBootApplication
import org.springframework.stereotype.Controller

@SpringBootApplication
@Controller
class Application implements CommandLineRunner {

    @Value('${sample.message:"default"}')
    String message

    @Override
    void run(final String... args) throws Exception {
        println "Spring Boot says: $message"
    }

    static void main(String[] args) {
        SpringApplication.run(Application, args)
    }

}

Our Gradle build file now looks like this:

buildscript {
    repositories.jcenter()

    dependencies {
        classpath 'org.springframework.boot:spring-boot-gradle-plugin:1.2.5.RELEASE'
    }
}

apply plugin: 'groovy'
apply plugin: 'spring-boot'

repositories.jcenter()

dependencies {
    compile 'org.codehaus.groovy:groovy-all:2.4.4'
    compile 'org.springframework.boot:spring-boot-starter'
}

// Reconfigure bootRun task to pass
// along the Java system properties
// from the command-line.
bootRun {
    systemProperties System.properties
}

Now we can run the following command from the command-line and set a value for the sample.message configuration property:

$ gradle -Dsample.message="Set by Java sys prop." -q bootRun
...
Spring Boot says: Set by Java sys prop.
...
$ 

Written with Spring Boot 1.2.5.RELEASE and Gradle 2.7.

Gradle Goodness: Pass Java System Properties To Java Tasks

Gradle is of course a great build tool for Java related projects. If we have tasks in our projects that need to execute a Java application we can use the JavaExec task. When we need to pass Java system properties to the Java application we can set the systemProperties property of the JavaExec task. We can assign a value to the systemProperties property or use the method systemProperties that will add the properties to the existing properties already assigned. Now if we want to define the system properties from the command-line when we run Gradle we must pass along the properties to the task. Therefore we must reconfigure a JavaExec task and assign System.properties to the systemProperties property.

In the following build script we reconfigure all JavaExec tasks in the project. We use the systemProperties method and use the value System.properties. This means any system properties from the command-line are passed on to the JavaExec task.

apply plugin: 'groovy'
apply plugin: 'application'

mainClassName = 'com.mrhaki.sample.Application'

repositories.jcenter()

dependencies {
    compile 'org.codehaus.groovy:groovy-all:2.4.4'
}

// The run task added by the application plugin
// is also of type JavaExec.
tasks.withType(JavaExec) {
    // Assign all Java system properties from 
    // the command line to the JavaExec task.
    systemProperties System.properties
}

We write a simple Groovy application that uses a Java system property app.greeting to print a message to the console:

// File: src/main/groovy/com/mrhaki/sample/Application.groovy
package com.mrhaki.sample

println "Hello ${System.properties['app.greeting']}"

Now when we execute the run task (of type JavaExec) and define the Java system property app.greeting in our command it is used by the application:

$ gradle -Dapp.greeting=Gradle! -q run
Hello Gradle!

Written with Gradle 2.7.

Gradle Goodness: Getting More Help For a Task

To see which tasks are available for a Gradle project we can invoke the tasks task. With this task all tasks are printed to the console with their description. To get more information about a specific task we can use the Gradle help task with the command-line option --task followed by the task name. Gradle prints out the path, type, description, group and optional options for the task.

Let's run the help task for the wrapper task:

$ gradle help --task wrapper                   
:help
Detailed task information for wrapper

Path
     :wrapper

Type
     Wrapper (org.gradle.api.tasks.wrapper.Wrapper)

Options
     --gradle-distribution-url     The URL to download the gradle distribution from.

     --gradle-version     The version of the Gradle distribution required by the wrapper.

Description
     Generates Gradle wrapper files. [incubating]

Group
     Build Setup

BUILD SUCCESSFUL

Total time: 0.568 secs

Or use the help task to get more information about the help task:

$ gradle -q help --task help
Detailed task information for help

Path
     :help

Type
     Help (org.gradle.configuration.Help)

Options
     --task     The task to show help for.

Description
     Displays a help message.

Group
     help

Written with Gradle 2.7.

September 20, 2015

Spring Sweets: Setting Configuration Properties Via Environment Variables

Spring Boot has many options for externalising the configuration of our application. One of the options it to use OS environment variables. We need to follow certain rules to name the environment variable and then Spring Boot will use the value of variable to set a configuration property. The property name must be in uppercase and any dots need to be replaced with underscores. For example the configuration property sample.message is set with the environment variable SAMPLE_MESSAGE. This feature can be useful in a continuous integration environment where we can set environment variables or just when developing locally. The nice thing is that this also works when we use the Spring Boot Gradle plugin. The environment variables are passed on to the Java process that the bootRun task starts.

The following source file is a simple Spring Boot command-line application. The sample.message property can be configured as by Spring. If there is no value set the default value "default" is used.

package com.mrhaki.spring

import org.springframework.beans.factory.annotation.Value
import org.springframework.boot.CommandLineRunner
import org.springframework.boot.SpringApplication
import org.springframework.boot.autoconfigure.SpringBootApplication
import org.springframework.stereotype.Controller

@SpringBootApplication
@Controller
class Application implements CommandLineRunner {

    @Value('${sample.message:"default"}')
    String message

    @Override
    void run(final String... args) throws Exception {
        println "Spring Boot says: $message"
    }

    static void main(String[] args) {
        SpringApplication.run(Application, args)
    }

}

We use the following Gradle build file with the Spring Boot Gradle plugin:

buildscript {
    repositories.jcenter()

    dependencies {
        classpath 'org.springframework.boot:spring-boot-gradle-plugin:1.2.5.RELEASE'
    }
}

apply plugin: 'groovy'
apply plugin: 'spring-boot'

repositories.jcenter()

dependencies {
    compile 'org.codehaus.groovy:groovy-all:2.4.4'
    compile 'org.springframework.boot:spring-boot-starter'
}

If we run the bootRun task without any environment variables set we get the default value:

$ gradle -q bootRun
...
Spring Boot says: "default"
...
$ 

Now we run the same task but set the environment variable SAMPLE_MESSAGE:

$ SAMPLE_MESSAGE="Message from env." gradle -q bootRun
...
Spring Boot says: Message from env.
...
$ 

Written with Spring Boot 1.2.5.RELEASE and Gradle 2.7.

September 17, 2015

Spring Sweets: Report Applied Auto-configuration Spring Boot

The auto-configuration feature in Spring Boot adds beans to our application context based on conditions. For example based on the availability of a class on the class path or a environment property beans are enabled or disabled. We must apply the @EnableAutoConfiguration or @SpringBootApplicaiton in our Spring Boot application to make this work. To get an overview of all the configurations that had positive and negative conditional matches in our application we can use the --debug command-line option. This will print out a report to System.out with a complete overview. We can check why a configuration is applied or not.

In the following Gradle build file we add the option --debug to the args property of the bootRun task:

buildscript {
    ext {
        springBootVersion = '1.2.5.RELEASE'
    }
    repositories {
        jcenter()
    }
    dependencies {
        classpath("org.springframework.boot:spring-boot-gradle-plugin:${springBootVersion}") 
    }
}

apply plugin: 'groovy'
apply plugin: 'spring-boot' 

sourceCompatibility = 1.8
targetCompatibility = 1.8

repositories {
    jcenter()
}

dependencies {
    compile 'org.codehaus.groovy:groovy-all:2.4.4'
    compile "org.springframework.boot:spring-boot-starter-actuator"
    compile "org.springframework.boot:spring-boot-starter-groovy-templates"
    compile "org.springframework.boot:spring-boot-starter-web"
    runtime "com.h2database:h2"
    testCompile "org.springframework.boot:spring-boot-starter-test"
}

bootRun {
    // Use --debug option to print out 
    // auto-configuration report.
    args '--debug'
}

Let's run the bootRun task and check the output (lines are omitted in the output shown next):

$ gradle bootRun
...
=========================
AUTO-CONFIGURATION REPORT
=========================


Positive matches:
-----------------

...
   GroovyTemplateAutoConfiguration
      - @ConditionalOnClass classes found: groovy.text.markup.MarkupTemplateEngine (OnClassCondition)

   GroovyTemplateAutoConfiguration.GroovyMarkupConfiguration
      - @ConditionalOnClass classes found: org.springframework.web.servlet.view.groovy.GroovyMarkupConfigurer (OnClassCondition)

   GroovyTemplateAutoConfiguration.GroovyMarkupConfiguration#groovyMarkupConfigurer
      - @ConditionalOnMissingBean (types: org.springframework.web.servlet.view.groovy.GroovyMarkupConfig; SearchStrategy: all) found no beans (OnBeanCondition)

   GroovyTemplateAutoConfiguration.GroovyWebConfiguration
      - @ConditionalOnClass classes found: javax.servlet.Servlet,org.springframework.context.i18n.LocaleContextHolder,org.springframework.web.servlet.view.UrlBasedViewResolver (OnClassCondition)
      - found web application StandardServletEnvironment (OnWebApplicationCondition)
      - matched (OnPropertyCondition)

   GroovyTemplateAutoConfiguration.GroovyWebConfiguration#groovyMarkupViewResolver
      - @ConditionalOnMissingBean (names: groovyMarkupViewResolver; SearchStrategy: all) found no beans (OnBeanCondition)
...

Negative matches:
-----------------

   ActiveMQAutoConfiguration
      - required @ConditionalOnClass classes not found: javax.jms.ConnectionFactory,org.apache.activemq.ActiveMQConnectionFactory (OnClassCondition)
...
$

Written with Spring Boot 1.2.5.RELEASE

September 16, 2015

Spring Sweets: Reload Classes Spring Boot With Spring Loaded And Gradle Continuous Build

When we develop a Spring Boot application we can hot reload newly compiled classes using Gradle. The bootRun task of the Spring Boot Gradle plugin has support for Spring Loaded. We must add a dependency to Spring Loaded as a dependency for the classpath configuration in the buildscript block. If we now use the bootRun task everything is ready to reload changed classes. Now we can use the continuous build feature of Gradle to listen for changes in our source files to recompile them. The recompiled classes are then reloaded in the running Spring Boot application started with bootRun. We start a second Gradle instance with the -t option for the classes task. This way when we change a source file it gets recompiled automatically and reloaded.

The following build script shows how we add Spring Loaded:

buildscript {
    repositories {
        jcenter()
    }
    dependencies {
        classpath "org.springframework.boot:spring-boot-gradle-plugin:1.2.5.RELEASE"
        classpath 'org.springframework:springloaded:1.2.4.RELEASE'
    }
}

apply plugin: 'groovy'
apply plugin: 'spring-boot'

jar {
    baseName = 'sample'
    version =  '1.0'
}

repositories {
    jcenter()
}

sourceCompatibility = 1.8
targetCompatibility = 1.8

dependencies {
    compile "org.springframework.boot:spring-boot-starter-web"
    compile 'org.codehaus.groovy:groovy-all:2.4.4'
}

Let's also create a very simple Spring Boot application:

package com.mrhaki.sample

import org.springframework.boot.SpringApplication
import org.springframework.boot.autoconfigure.EnableAutoConfiguration
import org.springframework.stereotype.Controller
import org.springframework.web.bind.annotation.RequestMapping
import org.springframework.web.bind.annotation.RequestMethod
import org.springframework.web.bind.annotation.ResponseBody

@EnableAutoConfiguration
@Controller
class SampleController {

    @RequestMapping(value = '/', method = RequestMethod.GET)
    @ResponseBody
    String sample() {
        'Sample controller'
    }

    static void main(String... args) {
        SpringApplication.run(SampleController, args)
    }

}

Now we can start a Gradle proces that will recompile class files if the source file changes:

$ gradle -t classes
Continuous build is an incubating feature.
:compileJava UP-TO-DATE
:compileGroovy
:processResources UP-TO-DATE
:classes

BUILD SUCCESSFUL

Total time: 2.847 secs

Waiting for changes to input files of tasks... (ctrl-d to exit)

In another terminal we start the bootRun task:

$ gradle bootRun
:compileJava UP-TO-DATE
:compileGroovy UP-TO-DATE
:processResources UP-TO-DATE
:classes UP-TO-DATE
:findMainClass
:bootRun
objc[16206]: Class JavaLaunchHelper is implemented in both /Library/Java/JavaVirtualMachines/jdk1.8.0_60.jdk/Contents/Home/bin/java and /Library/Java/JavaVirtualMachines/jdk1.8.0_60.jdk/Contents/Home/jre/lib/libinstrument.dylib. One of the two will be used. Which one is undefined.

  .   ____          _            __ _ _
 /\\ / ___'_ __ _ _(_)_ __  __ _ \ \ \ \
( ( )\___ | '_ | '_| | '_ \/ _` | \ \ \ \
 \\/  ___)| |_)| | | | | || (_| |  ) ) ) )
  '  |____| .__|_| |_|_| |_\__, | / / / /
 =========|_|==============|___/=/_/_/_/
 :: Spring Boot ::        (v1.2.5.RELEASE)

...
> Building 83% > :bootRun

Written with Gradle 2.7 and Spring Boot 1.2.5.

Groovy Goodness: IntelliJ IDEA Intentions For String Values

The best IDE to use when developing Groovy code is IntelliJ IDEA. The Groovy plugin has some nice intentions for us that we can use to optimise and refactor our code. We will look at some of the intentions that deal with String values in this blog post. The intentions shown here work in the free Community Edition as well in the paid Ultimate Edition. To see the possible intentions in IDEA we must select the Show Intentions Action. We need to check our shortcut keys to see the assigned shortcut. On my Mac it is for example Alt+Enter. Alternatively we can press the Shift key twice and type in Show intentions. IDEA will show the action with the shortcut key for us.

Suppose we have assigned a String value to a variable in our code. We used the double quoted syntax to do so, like in Java. But we want to change it to a single quoted String value, so to make it explicit the value cannot be a GString implementation. In the following screenshot we see our variable s with a value. We use our shortcut key to open the suggested intentions. We type convert to shorten the list with only conversion options. We see that we can change our String value to dollar slashy, regular expression, multiline or plain String syntax:

When we select Convert to String IntelliJ IDEA changed our value assignment:

We can also apply the conversion the other way around:

Another useful intention, especially when we copy-past some Java code in our Groovy source files, is to convert a String concatenation with the + operator to a GString value. We can select one of the elements of the concatenation and open the Show Intentions Action. Now we see the option Convert to GString:

When we select the option IDEA will turn the statement into a GString with the variable value replaced as an expression:

Also when we already have a GString value in our code we can remove unnecessary braces. In Groovy we can leave out the curly braces for dotted expression or the expression is a single value. We select the option Remove unnecessary braces in GString from the intentions to make this work:

The result is that the braces are removed:

Finally we take a look at the intention to turn a String value with end of line characters in it to a multiline String value:

If we have selected the option Convert to Multiline IDEA turns our original String value to a multiline String value:

Written with Groovy 2.4.4 and IntelliJ IDEA CE 14.1.4

September 15, 2015

Groovy Goodness: Exclude Transitive Dependencies With Grape

The built-in dependency mechanism in Groovy is Grape. With Grape we can define dependencies in our code and Groovy will download them and make them available when we run our Groovy application. The easiest way to use it is with the @Grab annotation with a dependency as the value. If we want to exclude a transitive dependency we use the @GrabExclude annotation. We must specify the attributes group and module of the annotation with the dependency we want to exclude. An alternative syntax is a shorthand version where the group and module are combined into a single String value separated by a colon (:).

In the following Groovy script we have a very simple Spring application with Java (Groovy) based configuration. So we need a dependency on the spring-context module. But we don't want to use the standard Spring logging. Spring used Apache Commons logging and we want to replace it with an SLF4J API implementation: Logback. So we use the @GrabExclude annotation to exclude the commons logging dependency. And we add two extra dependencies to replace it: org.slf4j:jcl-over-slf4j and ch.qos.logback:logback-classic.

package com.mrhaki

@Grab('org.springframework:spring-context:4.2.1.RELEASE')
// Exclude the commons-logging dependency 
// as Spring transitive dependency.
@GrabExclude(group = 'commons-logging', module='commons-logging') // Or 'commons-logging:commons-logging'
// Replace commons-logging with SLF4J 
// implementation Logback.
@Grab('org.slf4j:jcl-over-slf4j:1.7.12')
@Grab('ch.qos.logback:logback-classic:1.1.3')
import org.springframework.context.ApplicationContext
import org.springframework.context.annotation.Bean
import org.springframework.context.annotation.Configuration
import org.springframework.context.annotation.AnnotationConfigApplicationContext


// Define Spring Java (Groovy) configuration class.
@Configuration
class AppConfig {

    // Simple bean is a String.
    @Bean
    String obvious() {
        'Groovy is gr8!'
    }
}

// Create new Spring application context and use
// our Groovy configuration class
final ApplicationContext appContext = 
    new AnnotationConfigApplicationContext(AppConfig)

// Check that bean is in application context.
assert appContext.getBean('obvious') == 'Groovy is gr8!'

Written with Groovy 2.4.4.

September 14, 2015

Groovy Goodness: See More Info About Downloading With Grape

Groovy has a advanced feature to define and download dependencies automatically for our code: grape. To get more information about the progress of the dependency resolution and downloading of the dependencies we must use the Java system property groovy.grape.report.downloads and set it to true. Groovy uses Ivy under the hood to handle the dependency management. We can get Ivy logging messages by setting the system property ivy.message.logger.level to a numeric value. The value 4 gives the most logging and value 0 only shows error messages.

In the following example code we use -Dgroovy.grape.report.downloads=true when we invoke a simple Groovy script with a dependency on Apache Commons library:

import org.apache.commons.lang3.SystemUtils
import static org.apache.commons.lang3.JavaVersion.JAVA_1_8 as Java8

@Grab(group='org.apache.commons', module='commons-lang3', version='3.4')
def printInfo() {
    if (SystemUtils.isJavaVersionAtLeast(Java8)) {
        println 'We are ready to use the Stream API in our code.'
    } else {
        println 'We cannot use the Stram API in our code.'
    }
}

printInfo()

Now we run the script with extra logging information:

$ groovy -Dgroovy.grape.report.downloads=true sample.groovy
Resolving dependency: org.apache.commons#commons-lang3;3.4 {default=[default]}
Preparing to download artifact org.apache.commons#commons-lang3;3.4!commons-lang3.jar
Downloaded 424 Kbytes in 414ms:
  [SUCCESSFUL ] org.apache.commons#commons-lang3;3.4!commons-lang3.jar (408ms)
We are ready to use the Stream API in our code.
$ groovy -Dgroovy.grape.report.downloads=true sample.groovy
Resolving dependency: org.apache.commons#commons-lang3;3.4 {default=[default]}
Preparing to download artifact org.apache.commons#commons-lang3;3.4!commons-lang3.jar
We are ready to use the Stream API in our code.

Notice that the second time we run the script the logging shows the JAR file is not downloaded. That is because grape use the downloaded file from the USER_HOME/.groovy/grapes directory.

Written with Groovy 2.4.4.

Groovy Goodness: Change Directory For Saving Dependencies Grape

With Grape in Groovy we can add dependency management for our code. Especially the @Grab annotation is very useful to specify dependencies directly in our code. Groovy will download the dependencies if needed and store them in the USER_HOME/.groovy/grapes directory. If we want to change this directory we must set the Java system property grape.root. We specify the new directory to store the downloaded dependencies as a value.

In the following example we have a simple script with a dependency on the Apache Commons library. We use the -Dgrape.root command line option when we run the script and specify the directory deps. After we have run the script we can see the contents of the deps directory to see the downloaded files.

$ groovy -Dgrape.root=deps/ sample.groovy
$ tree deps
deps
└── grapes
    └── org.apache.commons
        └── commons-lang3
            ├── ivy-3.4.xml
            ├── ivy-3.4.xml.original
            ├── ivydata-3.4.properties
            └── jars
                └── commons-lang3-3.4.jar

4 directories, 4 files

Written with Groovy 2.4.4.

September 11, 2015

Groovy Goodness: Operator Overloading in Reverse

One of the very nice features of Groovy is that we can implement operator overloading. This blog post is not about how to implement operator overloading, but Groovy's operator overloading also means that operators we know in Java have corresponding methods, which are not available in Java. So instead of using operators in our code we can use the corresponding methods.

The following sample code shows some operators we know in Java and the corresponding methods in Groovy:

def a = true
def b = false

assert a | b
// Java Boolean has no or method.
assert a.or(b) 

assert !(a & b)
assert !(a.and(b))


def x = 100
def y = 10

assert x + y == 110
// Java Integer has no plus method.
assert x.plus(y) == 110 

assert ++x == 101  
// ++ maps to next method.
assert x.next() == 102

assert --y == 9
assert y.previous() == 8

Written with Groovy 2.4.4.

Groovy Goodness: Inspect Method Returns Nicely Formatted Object Values

Groovy adds the inspect method to the Object. This means it is available on all objects in our application. It is like the toString method, but adds some extra formatting. The most notable is the addition of single quotes to String values.

In the following example we see the output of the inspect method on different objects:

def username = "mrhaki"
// String value is enclosed in 
// single quotes.
assert username.inspect() == "'mrhaki'"


def user = "${username}" 
// user is GStringImpl not a String object,
// so no single quotes are added by
// inspect() to show value is a String object.
assert user.inspect() == "mrhaki"


def multiline = '''Hello mrhaki,
how you're doing?'''
// Special characters like tab,
// line feed and single quotes
// are escaped.
assert multiline.inspect() == /'Hello mrhaki,\nhow you\'re doing?'/


def list = [42, '1', ['Groovy rocks!']]
// String values in the list are
// enclosed in single quotes.
assert list.inspect() == "[42, '1', ['Groovy rocks!']]"


def range = 21..<24
// Ranges are shown 
// with .. or ..<.
assert range.inspect() == '21..<24'


def m = [a: 1, b: '1']
// Map keys and values are shown
// as their base type. Mostly
// keys are String values, so with
// inspect() they are enclosed in quotes.
assert m.inspect() == "['a':1, 'b':'1']"


import org.w3c.dom.Document
import org.w3c.dom.Element
import groovy.xml.DOMBuilder

def xmlString = 'mrhaki'
Document doc = DOMBuilder.newInstance().parseText(xmlString)
Element root = doc.documentElement.firstChild
// XML Element objects are shown as 
// textual XML.
assert root.inspect().trim() == 'mrhaki'

Written with Groovy 2.4.4.

Groovy Goodness: Removing Elements From a Collection

There are a lot of methods added to the Java collection classes by Groovy. For example to remove elements from a collection, and indeed modify the collection itself, we can use the removeAll and removeElement methods. With the removeAll method we define a closure with a condition that needs to be true for an element to be removed from the collection. The removeElement method is added to overcome any ambiguity with the standard overloaded remove method for collections with integer values. The remove method accepts both an Object or int value, to remove either an element or an element at the specified index. When the collection contains integer values than the argument is interpreted as index value. The removeElement method will use the remove(Object) method implementation. When the collection is a List Groovy adds the removeAt method. We need to specify the index value of the element we want to remove.

def list = ['Groovy', '=', 'gr8!']

// Groovy adds removeAll method
// to remove items from collection
// that apply to the condition we 
// define in the closure.
list.removeAll { it.toLowerCase().startsWith('g') }

// All values starting with a G or g
// are now removed.
// Remember the collection we use the
// removeAll method on is changed.
assert list == ['=']

// Java 8 adds removeIf method with
// a predicate. In Groovy we can implement
// the predicate as closure.
list.removeIf { it instanceof String }

assert list.size() == 0


def values = ['Hello', 'world']

// Groovy adds removeAll(Object[]) 
// to remove multiple elements
// from a collection.
values.removeAll(['world', 'Hello'] as Object[])

assert values.empty


def items = [1, 2, 3]

// remove method is overloaded
// for Object and index value.
// Because Groovy wraps int to
// Integer object, the method call
// is ambiguous for Integer collections.
items.remove(1)

// We want to remove object
// Integer(1) from the list,
// but item with index 1 is removed.
assert items == [1, 3]

// Groovy adds removeElement
// as alias for remove(Object).
items.removeElement(1)

assert items == [3]

// When the collection is a List
// we can use the removeAt method
// to remove based on index value.
items.removeAt(0)

assert !items

Instead of removing elements with a any of the remove... methods we can also use the retainAll method in Groovy. Any elements that don't apply to the condition we specify in the closure are removed from the collection. See the following example code with some usages of the retainAll methods:

def list = ['Groovy', 42, 'gr8!', 5.2, new Date()]

// Groovy adds retainAll method
// to remove items from collection
// that do not apply to the condition we 
// define in the closure and keep those
// items that do apply to the condition.
list.retainAll { it instanceof String }

// All values that are not a String
// object are removed.
// Remember the collection we use the
// retainAll method on is changed.
assert list == ['Groovy', 'gr8!']


def values = ['Hello', 'world', 'from', 'Groovy']

// Groovy adds retainAll(Object[]) 
// to keep multiple elements
// in a collection and remove all
// the other elements.
values.retainAll(['world', 'Hello'] as Object[])

assert values.join(' ') == 'Hello world'

Written with Groovy 2.4.4.

September 10, 2015

Awesome Asciidoctor: Leave Section Titles Out of Table Of Contents

Section titles in our document (titles start with two or more equals signs) are part of the document hierarchy and therefore can be used in a generated table of contents. If we don't want to include a section title in the table of contents we must make the title discrete. The title is styled like a normal section title, but it is no longer part of the document structure as title. Therefore the section title will not be generated in the table of contents. To make a title discrete we must use the attribute discrete for the title.

In the following document we first have a simple document with two section titles. When we generate the HTML for this document we see both titles in the table of contents.

:toc:
= Section example

== Introduction

Simple introduction section.

== More

There is more information in this document.

Now we make the first section title discrete by applying the discrete attribute:

:toc:
= Section example

[discrete]
== Introduction

Simple introduction section.

== More

There is more information in this document.

We generate the document again as HTML and this time we see the section title is no longer in the table of contents:

Written with Asciidoctor 1.5.2.